The Step mode is a different way to create rhythms and melodies. Unlike the Live mode — where you perform in real–time using the matrix keypads — this mode allows you to program sequenced events directly into the current track. It is a great way to get the best out of your synthesizers and drum machines.
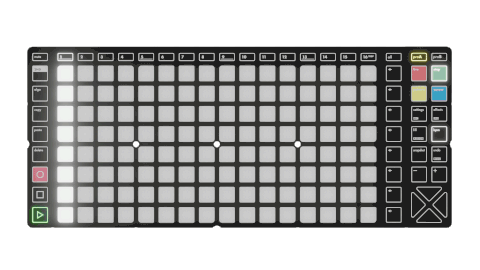
Hapax a 128–pad matrix to program step–by–step rhythms and melodies effortlessly and efficiently. The length of a track can be extended up to 32 bars. In conjunction with extreme zooms, conditional trigs, chance, loop points, selection, scale folding, run modes, possibilities are endless!
The Step mode can also be used to edit a previously recorded live performance, using the piano roll view.
The Step mode, like the Live mode, always displays the events contained the current pattern of the active track. Each pattern of each track has its own events.
Piano roll overview
The piano roll is always displaying the full current pattern on the right screen. The grey rectangle inside is called the viewport. It indicates which portion of the page that is shown on the pad matrix.
The 128–pad matrix always displays the current page, depending on the current zoom and track length settings:
The lower–left pad holds the note set in the upper–left corner of the right screen.
Tip In case you are lost in the piano roll, a simple Step Press will automatically focus the pad matrix onto the closest note.
By default, the displayed page follows the playhead. To temporarily lock the view to the current page, simply Press or . A single Step Press will revert back to the default behavior. This option can be permanently disabled in this sectionthis section of the settings.
Basic operations
Press a pad of the matrix to add a note.
Tip Hold a pad (empty pad, or pad already containing a note) and Press another pad to set the end of the note. To set a length of 1 step, Hold the pad and tap a pad placed on the same column.
Adding a note while the sequencer is stopped will send a short pre–listen of this note to the output. This behavior can be disabled in this sectionthis section of the settings.
Rotate the Note encoder to set the lower–left note of the pad matrix, from C0 to G10. The main encoder can also be used. A third way to perform this action is to Hold 2ND and Press or .
Rotate the Octave encoder to set the octave, from 0 to 10. You can also Press or .
Rotate the other encoders to change their corresponding parameters.
Press + to zoom in, Press – to zoom out.
Press or to navigate between pages.
Tip Hold 2ND + + or – to double or halve the length of the pattern.
Tip Hold 2ND + or to duplicate/divide the pattern along with its events.
Tip Hold a pad of the matrix to override the global parameters with the ones contained in this pad (quick capture). You can disable this behavior in Settings → Misc → Hold Step Capture.
Tip Hold mute and Press a pad in the matrix to mute it instantly. The note will be dimmed. To unmute it, repeat the same action or simply Press the matrix pad.
Hold track to enter the track settings.
Note parameters
Each note event includes its own set of 8 parameters : Note & Octave, Velocity, Length, μTime, Chance, Roll, Math. Step parameters are visible on the left screen. Each one of them is connected to its own encoder:
To adjust the global note parameters, simply set the values with the encoders. The notes that will be added will be created with those attributes.
To modify the parameters of existing notes, Hold a pad or a selection of multiple pads.
Modifying the pitch, octave or velocity of existing notes while the sequencer is stopped will send a short pre–listen of those notes to the output. This behavior can be disabled in this sectionthis section of the settings.
NOTE LENGTH 1/16 ... INFINITY Sets the length of the note in steps. A step corresponds to a 16th note when using the default zoom. Infinite notes won't stop or be retriggered until the button is pressed.
Hold a pad containing a step, Press the encoder to highlight the tick value, then Rotate to finetune the note length:
uTIME –50% ... +50% Time offset : slightly moves the note around its central step position. On the right (+) the note will be delayed, on the left (–) the note will play sooner.
CHANCE 0% ... 100% Sets the probability for the note to be played.
ROLL 1/8 ... 1/256 Note will repeat throughout its length (ratcheting)
MATH /SYNC SYNC, /PREV PREV /1ST 1ST ... Conditional trigs allow you to set a condition to a note to be played. Here are some examples :
1:2 — note plays the 1st time, every 2 loops
2:3 — note plays the 2nd time, every 3 loops
!2:4 — note not plays the 2nd time, every 4 loops
FILL — note plays if the fill button is pressed
!FILL — note plays if the fill button is released
PRE — note plays if last condition of track was valid
SYNC — note plays if added on 1st step of a beat
NT=0 — plays only if no other notes are played
PB<5 — plays if last beat played less than 5 notes
NO FX – note is not sent to the FX chain
Note When scrolling through the Math parameter, RGB leds are dimmed to highlight events with the same Math parameter. This visual feature also works for Roll and Chance parameters.
Hold an encoder to reset a parameter to its default value, for example Velocity = 100.
Tip Hold all to select all notes, then Hold the uTime encoder to quantize all notes to their closest step position. Zoom in/out to "select" the grid of quantize you need (default zoom = 100% = quantize 1/16). This approach enables you to quantize either the entire pattern or only the selected notes, consolidating them in a destructive manner.
Note selection
You can select one, or a group of notes to edit all their parameters at the same time.
Single–event Selection
Hold a note on the piano roll. The pad color will change and the selected note parameters will be displayed on the left screen.
Keep holding the pad and Rotate one of the encoders to change the corresponding parameter.
Tip TWO–FINGER STEP LENGTH : Set the length of a step by holding one pad (the start point) and tapping another pad (the end point). This works both for creating new notes and editing existing ones. Examples: • Hold step 1, Press step 12 → length = 12 • Hold step 9, Press step 8 → length = 16 • Hold step 3, Press any step in same column → length = 1
Tip Hold an empty pad and rotate one of the parameter encoders creates a note directly in that step, to speeds up event creation when building patterns.
Tip Hold a note pad momentarily to override the global parameters values with the values contained in this note.
Multiple–events Selection
Hold a pad on the piano roll, then Hold another pad to select multiple notes.
To perform a selection, you can also: • Hold all to select all events. • Hold a row to select a single row of events. • Hold more than one row to select a range.
While selecting steps: • Rotate an encoder to change the corresponding parameter. • Press or to move your selection left/right. • Press or to move your selection up or down. • Press mute to mute/unmute your selection. • Press delete to erase your selection. • Press copy to save a copy (see PASTING below). • Press + or – to warp or rotate (see WARPING below).
Tip By default, a multiple–events selection will select all notes on the vertical axis inside your selection. Hold 2ND while making your selection to constrain your selection to the selected notes.
Tip Press 2ND during an all or row selection to toggle between single–page and all–pages selection.
Pasting
To paste your copied selection: Hold paste and Press a piano roll pad. When pasting, only the horizontal position is important (pasted notes pitch/octave will stay the same).
To paste a selection at a precise XY position (transposing the copied motif), Hold 2ND + paste and Press a piano roll pad.
Warping
When a multiple-events selection is active, you can warp your events in time by using + and – . In other words, you can compress or expand rhythms.
Note The MISC setting "SELECT +/–" need to be set to WARP. Otherwise the selection will rotate when using + and – .
EXAMPLE 1
In zoom x1, place three events on consecutive pads, to create three 16th notes.
Now select these events, making sure the selection spans exactly three columns, i.e. three 16th notes.
Press + .
The three events now span four 16th notes, and are still regularly spaced, which results in triplets.
EXAMPLE 2
In zoom x1, place five events on consecutive pads, to create five 16th notes.
Now select these events, making sure the selection spans exactly five columns, i.e. five 16th notes.
Press – .
The five events now span four 16th notes, and are still regularly spaced, which results in quintuplets.
Of course, you can press + and – multiples times, and program complex rhythms, polyrhythms and swings easily.
Tip The warp feature is a great way to program tuplet-swing. For a quintuplet swing: • start with empty drum lane, • fill the first and the fourth step ■ □ □ ■ □ □ □ □, • select the first five steps and press – once. For a septuplet swing: • start with empty drum lane, • fill the first and the fifth step ■ □ □ □ ■ □ □ □, • select the first seven steps and press – three times.
Track length, zoom and navigation
Length
Each of the 16 patterns of each track can have a different lengths. The track length can be set between 1 and 32 bars.
To set it, Hold a track and use the Length encoder. You can Hold + Rotate this encoder to increment the length in steps (from 1 step to 512 steps).
Tip Quick length modifiers :
Hold 2ND + + to double pattern length Hold 2ND + – to halve pattern length Hold 2ND + to double pattern length and copy events Hold 2ND + to halve pattern length and delete events
Zoom
Press + or – to zoom in or out:
• /16 (a step = a whole note = 1/1 = a bar) • /8 (a step = a half note = 1/4) • /4 (a step = a quarter note = 1/4) • /2 (a step = a eighth note = 1/8) • ×1 (no zoom = 1 bar of 16 steps per page) • ×2 (a step = a thirty–second note = 1/32) • ×4 (a step = a sixty–fourth note = 1/64) • ×8 • ×16 (ideal for precise micro-editing) • ×48 (the max resolution, a step = 2.55ms at 120 BPM)
Press + and – at the same time to Toggle between regular and triplet zooms.
A page is what you can see on the matrix pads, represented by the smaller grey rectangle on the piano roll screen, called viewport. When increasing the track length or zoom values, the viewport will exceed one page. The piano roll screen will always display the entire pattern with all its pages.
Press or to navigate to previous or next page.
Loop points
Loop points allow you to set up in real–time where your pattern begins and ends. Only the pattern inside your loop points will be played. You can set different loop points for every pattern within every track.
When composing, it is a great way to loop a small part you want to focus on. When performing, you can play with track positions and create interesting effects like beat repeats or polymeters.
Hold and Press one of the 1...16 track buttons to set your loop point start.
Hold and Press one of the 1...16 track buttons to set your loop point end.
Press both + to remove the loop points.
Project scale (pScale)
Hold proA or proB to enter the project settings. Set the pScale param to ON to enable the project scale.
When a global pScale is enabled, the matrix pads only show the notes of the selected scale:
There are never more than 8 notes in a scale, so the 8 rows will always show the same note. For example, if the key note of the scale is F, the bottom row will always display the F note of the selected octave.
Once pScale is enabled, only in–scale notes can be added with the matrix pads. The vertical navigation in the piano roll is now octave by octave. This simpler interface garantees that no out of scale note can be added anymore.
Tip Even with pScale set to ON, you can disable it for individual tracks in their secondary setting window. Press 2ND + Track and set pScale to OFF.
Mono edit
Use the shortcut 2ND + Step to enable the MONO EDIT mode.
It allows you to edit the track in a monophonic way. Whenever you add a new step to the track, all the other steps sharing the same vertical position will be automatically removed.
When enabled, a message appears on the left screen:
On the matrix pads, if a note is placed in a step but is 'out-of-scope' (either above or below the visible range), a blue gradient will appear to indicate that the step is occupied.
NOTE LEARN can learn both single notes and chords (multiple notes) from either the Live mode keypads or an external controller.
Before enabling NOTE LEARN, it is necessary to first play a note on the Live pads, or on an external keyboard:
At this point, Hapax is not learning notes at this stage, but it has recognised the note input. Press the Learn[+] encoder to enable NOTE LEARN. The display will change to:
The pads are now reflecting notes played in Live mode, or on an external keyboard. Playing a single note will move the view, so that the bottom row follows the note pressed.
To add this note, Press a pad on the bottom row.
However, if a chord is learnt (e.g. C +2), Press any pad in the column to add this chord to the pattern. If notes were previously added on this column, they will be first deleted.
To turn NOTE LEARN off (and so stop the view moving when note are performed from an external controller), simply Press (or rotate) the Note encoder or the Octave encoder (the top–left encoders).
Tip Press 2ND + settings to enter REC SETTINGS and Rotate the Note encoder to completely disable NOTE LEARN.
Math (Conditional Trigs)
Also known as "Conditional Trigs" in the sequencing vocabulary, the math operations are conditions that you can add to individual events to modify their behavior.
A "!" before a condition means NOT. For example !FILL has the opposite behavior of FILL.
FILL FILL Note plays only when fill is held. !FILL Note plays only when fill is not held.
CONDITIONAL 1ST Note plays on first pattern playback. !1ST Note does not play on first pattern playback. PRE Note plays if last condition was valid (track level). !PRE Note plays if last condition was not valid.
SYNC SYNC Note plays if added on 1st step of a beat. !SYNC Note plays if not added on 1st step of a beat.
NOTES NT=0 Note plays only if no other notes are played. NT<2 Note plays if less than 2 notes are played. NT<3 Note plays if less than 3 notes are played. NT<4 Note plays if less than 4 notes are played. NT<5 Note plays if less than 5 notes are played.
Those conditions are applied at project level.
LAST STEP / LAST BEAT PS=0 Note plays if last step played zero notes. PS<2 Note plays if last step played less than 2 notes. PS<3 Note plays if last step played less than 3 notes. PS<4 Note plays if last step played less than 4 notes. PS<5 Note plays if last step played less than 5 notes.
PB=0 Note plays if last beat played zero notes. PB<2 Note plays if last beat played less than 2 notes. PB<3 Note plays if last beat played less than 3 notes. PB<4 Note plays if last beat played less than 4 notes. PB<5 Note plays if last beat played less than 5 notes.
Those conditions are applied at project level.
ONE IN... 1:2 … X:Y Plays the note X time each Y loops. !1:2 … !X:Y Does not play the note X time each Y loops.
NO FX FX IF FILL Note sent into the FX chain if fill is held. NO FX IF FILL Note not sent into the FX chain if fill is held. NO FX Note never sent into the FX chain. Note The FX chain also includes the pSCALE and pTRSP effects. The parameter NO FX notes will also bypass these effects. Click here for more infoClick here for more info.
Tip When fill is held, adding notes will force them with MATH = FILL .
Step–rec mode
Step Recording, inspired by the SH-101, TB-303 and CS70 synthesizers, provides an alternative way to program notes into the sequencer, without having to play them in real-time.
To enter Step–rec mode, press Live and Step together.
In this mode, you can input notes using either an internal or external keyboard. As you enter each note, it gets added to a sequence displayed on the screen. Once you've finished inputting the notes, press APPLY to fill the pattern with the sequence you created in the order, length and rhythm defined.
To input a chord, play multiple notes simultaneously and release them: the chord will be recorded as a single step. — If you prefer monophonic sequencing, enable MONO mode. In this mode, each played note will occupy its own step, disabling polyphony. — You can also enable the MONO + LEGATO mode. When you play a new note while holding another, the two notes will slightly overlap, creating a legato/glide effect (if your monophonic synthesizer supports this feature).
These controls are available by clicking the encoders: • APPLY : add the Step–rec sequence in the current pattern • REST : insert a silence between notes • TIE : extend the previously added note • BACK : reset the previous step • CLEAR : reset the Step–rec
By default, when applying the recorded sequence, notes are added at a 1/16 rate. You can adjust this timing using the RATE encoder.
In the example above: • step 1 contains a single note. • step 2 contains a single note. • step 3 is tied to step 2. • step 4 is a rest. • step 5 contains a single note. • step 6 contains a 4-note chord. • step 7 contains an 8-note chord. • step 8 contains a single note. • step 9 is empty, awaiting input.
Note The maximum steps of the Step–rec sequence is 32. The maximum note polyphony per step is 16.
Tip You can assign REST and TIE to the footswitch in the settings.
Tip To delete all notes applied in the current pattern, Hold delete + Press Step
The DRUM track type is particularly suited for drum machines, grooveboxes and samplers.
Once in step mode, Hold Step and Rotate the menu encoder to set the track type to DRUM.
In this mode, each percussive element, along with its events, corresponds to a drum lane.
There are 8 lanes in total :
This step mode shares basic operations, selection & editing, copy/paste, mute and loop points with the POLY and MPE step modes.
A drum note has the same parameters as any other note: Velocity, Length, µTime, Chance, Roll, Math and Mute. Hold a pad to access its parameters.
Hold a pad and Press or for faster velocity adjustement (HARD, PUNCH, MEDIUM, SOFT and GHOST accents).
Tip To mute an entire lane at once, instead of muting each drum event individually using mute + Press on pads, you can Hold a row button to select all events and Press mute . Repeat the same action to unmute the lane.
The principal difference is that instead of pitch & octave parameters, a drum note has a TRSP (transpose) parameter. Changing this parameter will transpose the base midi note of the drum lane to allow for pitched drumming. Note that this only works if the corresponding lane outputs midi instead of CV or gate signals.
In the example above, the selected drum event has a TRSP of +12. The resulting midi note is also displayed (60 = C note).
Drum Track – Select and Rename a lane
In DRUM tracks, events are organised in lanes. The lanes are, by default, named as follows:
Kick
Snare
Closed HH
Open HH
Low Tom
Hi Tom
Hand Clap
Cowbell
To select a drum lane, you can either Rotate the main encoder, or Press the row button corresponding to the lane.
To rename this selected lane, Press the menu encoder.
To move this selected lane position up or down, Hold 2ND and Press or .
Drum Track – Lane MIDI routing
A lane is characterized by its corresponding note. This means that events in a drum lane will always trig the same note. This is ideal for working with drum machines, which usually expect a given note for a given drum element.
Each lane can have its own particular pair of note/channel. It is also possible to have a lane triggering a gate output : you can mix and match multiple machines to create your drums ensemble.
To access the settings of a lane, Hold a row button:
INPUT 0 ... LINK ... 127 Rotate this encoder to set the note triggering this lane. LINK means that the INPUT and the OUTPUT parameters are linked: the same note will both trigger the lane and be outputed by it. Hold the encoder to reset it to this default value.
OUTPUT NOTE 0 ... 127 Rotate this encoder to set the note outputed by this lane. The TRSP parameter of drum events selection will transpose from this reference note.
OUTPUT CHANNEL CH TRACK CH 01 ... CH 16 GATE 1 ... GATE 4 CV 1 ... CV 4 CV/GATE 1 ... CV/GATE 4 Press the OUTPUT encoder to access this secondary parameter. Then Rotate this encoder to set the channel of the lane output. • By default, it's set to TRACK CH, which means that the lane output channel will be the same as the track channel. Hold the encoder to reset it to this default value. • A lane can also trig its drum events on a selected GATE output or a CV output (a CV output will act like a gate, with 0V–5V trig levels). • You can use the CV/GATE output to perform with drum accents (the gate will trig the event, the CV will output the drum velocity).
Note On DRUM tracks, the midi output channel defined in the track settings affect the lanes outputs only if OUTPUT = TRACK CH, and it will be used for MIDI automation lanes output.
Tip You can Hold multiple rows (or all rows) and adjust the OUTPUT notes of all selected lanes at once. This makes it easier to quickly route your track to an external drum kit.
Drum Track – Velocity view
To enter the VELOCITY VIEW, Hold 2ND and Press a row to select the lane you want to edit.
In this submode of DRUM, the matrix pads show the note velocities of the selected drum lane. Press a pad to change the velocity of an existing note.
To exit velocity view, simply press Step .
Tip Hold 2ND and press a pad to add events from VELOCITY VIEW. Events will be created at a velocity corresponding to the pressed pad. Please note however that pressing the lowest row will delete existing events.
Drum Track – Drum Pads / Drum Kit animation
By default, the left screen displays animated drum pads that respond visually to the played MIDI events. To switch to a drum kit animation, rotate the top-left encoder.
This is a purely visual feature with no impact on functionality. Choose the one that best suits your visual preference.


 to program step–by–step rhythms and melodies effortlessly and efficiently. The length of a track can be extended up to 32 bars. In conjunction with extreme zooms, conditional trigs, chance, loop points, selection, scale folding, run modes, possibilities are endless!
 or
or 


 button is pressed.


.webp)


.webp)


.webp)

