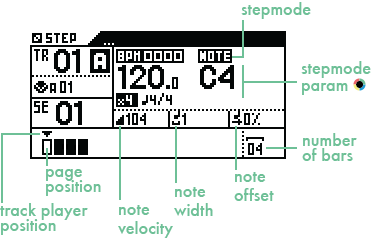
02 Screen
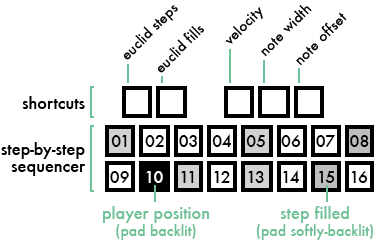
03 Pads
04 Change the stepmode
05 Note stepmode
06 Chord stepmode
07 Euclid stepmode
08 CC messages stepmode
09 Effects stepmode
10 Track player: pages, zoom and length
11 Rotate
12 Duplicate
13 Copy/paste steps
14 Delete steps
15 Encoder step edit
16 Filter
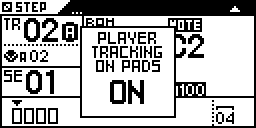
17 Player tracking

Pyramid includes 16-step pads

Step Mode also allows you to edit a previously recorded live performance, using the piano roll view.

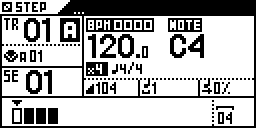
● NOTE (default)
● CHORD
● EUCLID
● EFFECTS
● CC MESSAGES


All stepmodes (except EUCLID) can be used together to create a track. For example, you can add chords with the CHORD stepmode, then edit these chords with the NOTE stepmode, create step-lock automation with CC MESSAGES and EFFECTS stepmodes, go back to NOTE stepmode to add extra notes...
EUCLID stepmode can't be used with NOTE or CHORD stepmodes because the euclidean algorithm takes exclusive control of the track player.
This mode allows you to program notes by filling steps.


Tip Hold 2ND and rotate

Tip Preview the current note by pressing


At any time, you can zoom to increase the step resolution and navigate the pages with < and > .

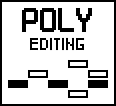
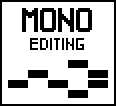
POLY EDITING is enabled by default. Poly mode is useful when editing tracks controlling polyphonic instruments. This mode allows you to add multiple notes to a single step. In POLY EDITING mode, pads will be softly backlit only if they are filled with the current note, displayed on the screen. When copying steps, copy will only copy the current notes. The same behavior is true for paste , transpose, move horizontally, and for velocity, width, offset quick edits.

Tip Switch to MONO EDITING to have a global view of which of the 16 steps are filled with notes. If you press a filled step, it will remove all notes in this step, whatever the current note is.
Tip A long press on a step (if MONO EDITING enable) auto-select the nearest note of the step. For example if a step contains a C2 and a C3 note, and if the current note of the piano roll is C4, a long press will select the note C3. Very handy to quickly view or edit a note in a step.
When you add a note on a step, the step is filled with its 3 current parameters: velocity, note width and offset. Default velocity is 100, default note width is 1 step and default offset is 0%.
This means that by default notes will fill a step from its start to its end. Note duration depends on zoom and time signature. If zoom = x1 (100%) and note width = 1, an added note will be a quarter note (because the 16 steps represent 16 quarter notes). If zoom = x4 (400%) and note width = 1, the added note will be an sixteenth note (because the 16 steps now represent 16 sixteenth notes). You can play with the zoom shortcut to edit your track with a high degree of resolution!
● SET NOTE VELOCITY


Tip Double tap a step pad

● SET NOTE WIDTH


Tip Using a note width longer than 1 step is an easy way to create slides on monophonic instruments.
● SET NOTE OFFSET


When you hold a step (or when you hold two steps to select a row of steps), the screen displays the note parameters of the selection:
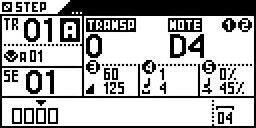
Note velocities ranges from 60 to 120, note width ranges from 1 step to 4 steps, note offsets ranges from 0% to 45%.
Now you can quickly edit selected note parameters:
● Rotate encoder 1 to transpose notes
● Rotate encoder 2 to transpose notes, by octaves
● Rotate encoder 3 to increase/decrease velocity
● Rotate encoder 4 to increase/decrease note width
● Rotate encoder 5 to increase/decrease note offset
● Press < or > to move horizontally the selection
Tip In POLY EDITING mode, you will edit only the current note of the selection. In MONO EDITING mode, you will edit all notes of the selection.


Use your external keyboard to set the current note, or even a chord!
A step can be filled with a note received on the MIDI input, (for example C3♯). You can also perform a chord with your external keyboard (for example C2+2) instead of a note. So you can fill your step sequence with custom chords:
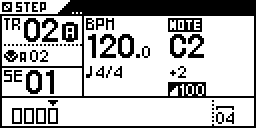


In POLY EDITING mode, you will mute only the selected note of the step. In MONO EDITING mode, you will mute all notes of the step.
Muted steps are softly highlighted.
Press DISP to view the piano roll sequencer:
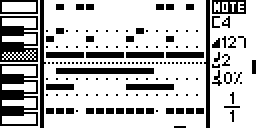
An example of a track, programmed with notes of different lengths. You are viewing the page 1 (of 1 page). The current note is C4, the current velocity is 127, the current note length is 4 steps and the current offset is 0%. If you press a step to add a note, the note will be added with these parameters.
It's a great way to see the notes you are editing, for example:


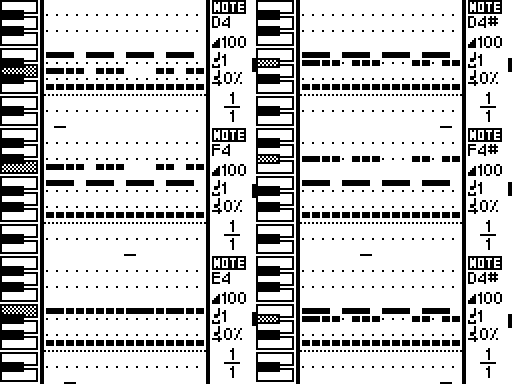


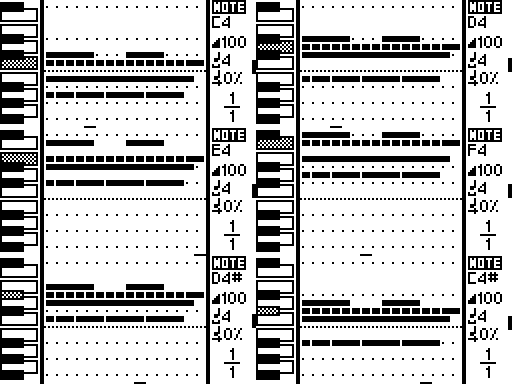
● In MONO EDITING, hold a step


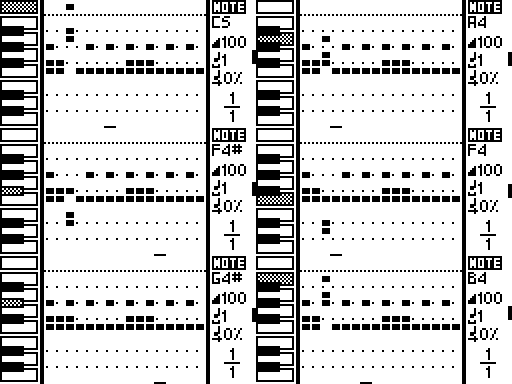
Tip Press STEP to go to the nearest note. Press STEP again to go to the next nearest note.
This mode is similar to the Note Stepmode except the steps are filled with chords.
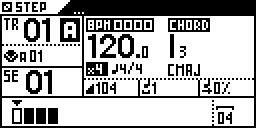


Tip Preview to the selected chord by pressing

You can add one chord per step. If you add a chord to a step that has already been filled, the previous chord will be replaced with the new one.
There are 7 chord degrees across the 10 octaves:
I II III IV V VI VII
These are the same chords you will find on the Live Mode’s chord smartpads (chord degree I is smartpad 1, chord degree III is smartpad 3, etc.)
The chord tonality (by default CMAJ) and the chord complexity (by default 3) can be set in the Live Mode using the chord smartpads.
Note: Read the Live Mode section for further details about chord generation.
Press DISP to view the piano roll sequencer:
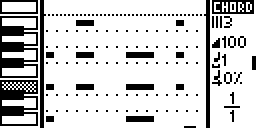
An example of a track, programmed with chords of different lengths. You are viewing the page 1 of 1 page. The selected chord is III3, the current velocity is 100, the current note length is 1 steps and the current offset is 0%.
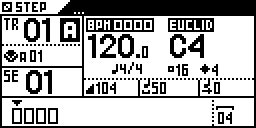
Originally derived from nuclear physics, and then applied to music theory, an Euclidean algorithm evenly generates distributed notes (fills) among a defined number of available slots (steps).

This leads to a great number of well-known rhythm patterns, as well as many odd-sounding ones. Almost all traditional rhythms from across the world can be generated with this tool, which is why we decided to implement on the Pyramid.
The EUCLID stepmode takes exclusive control of the track player. You can’t use it together with NOTE and CHORD stepmodes. When you change stepmodes, EUCLID is activated at the STEP pad release, and NOTE + CHORD stepmodes are disabled. As soon as you switch to NOTE, CHORD, CC MESSAGES or EFFECTS stepmodes, EUCLID is disabled again.

Press 2ND + < or 2ND + > to rotate the pattern. Turn to change the triggered note (for example C3♯) and use note width to change the gate.

By default, there are 16 euclid steps (1 bar) and 4 euclid fills.
Turn

Press DISP to view the Euclidean circle:
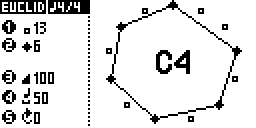
Tip Steps that are filled with notes are displayed on the pads. You can press a step

You can create multiple euclidean tracks to generate complex rhythmic patterns. Each pattern will be 1 bar or shorter in length, but if each bar is a different length, they will shift against each other creating a constantly changing loop.
Tip Decrease the time signature lower number to multiply the euclidean pattern length (only if SETTINGS > MISC > SIGNATURE = POLYRHYTHMS). By default the time signature of a euclidean track is 4/16 (1 bar long) but you can set a 4/8 time signature (2 bars long), a 4/4 time signature (4 bars long)...
Use your external keyboard to set a note, or even a chord, from any mode!
The euclidean note can be filled with a note received on the MIDI input, (for example C3♯). You can also perform a chord with your external keyboard (for example C2+2) instead of a note. So you can create an euclidean pattern with custom chords.


This stepmode allows you to create CC automation.
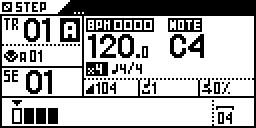


PITCH BEND message is selected, the current value is 63


PITCH BEND automation is selected, the current value is 127 (if you press a step, a pitch=127 message will be added)

At any moment, press DISP to display the automation:
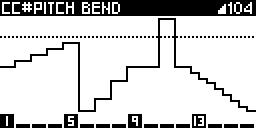
A 16-step automation of the PITCH BEND message. The dotted line represent the current CC value.

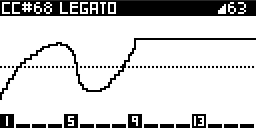
This stepmode can also be used to display and edit automation recorded in live mode, for example CC10 value performed with the touchpad:
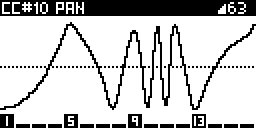
A live recorded automation of the CC10 (PAN) message.
As in other stepmodes, you can zoom to increase the step resolution and navigate the automation pages with < and > :
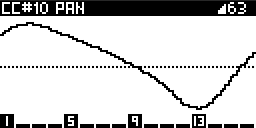
A live recorded automation of the CC10 (PAN), zoomed.

Tip Press the menu encoder to "preview" the current (dotted line) CC value.
Tip Press STEP to go to the nearest CC automation. Press STEP again to go to the next nearest CC automation.

Each new automation drawn will delete the last automation.

You can also increase or decrease a row of steps


This stepmode allows you to create FX parameters automation. First, you need to add at least one effect with the FX manager on the current track, for example an arpeggiator.
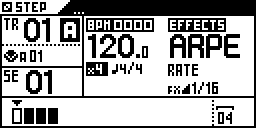


ARPEGGIATOR effect: RATE parameter is selected, the current parameter value is 1/4


ARPEGGIATOR effect : RATE parameter is selected, the current parameter value is 1/32 (if you press a step, a rate=1/32 message will be added)
Fill some steps with different parameters values. Press DISP to display the automation:
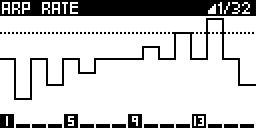
A 16-step automation of the ARPEGGIATOR effect : RATE parameter

As in other stepmodes, you can zoom to increase the step resolution and navigate the automation pages with < and > to create a complex automation:
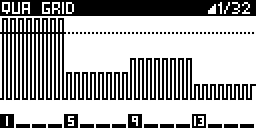
A 64-step automation of the QUANTIZER effect : GRID parameter
This stepmode can also be used to display and edit automation recorded in live mode, for example a swing automation performed with an encoder:
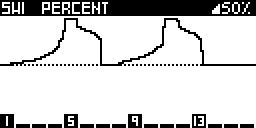
You can create an infinite number of automation on the same track. Rotate


Newly drawn automation replaces all prior automation on that track.

You can also edit FX parameters on a sequential range of steps


A default track is 1-bar long. Therefore, the track player zone displays 4 white measures: they are the 4 measures you can see on the 16 pads (currently viewed page) in Step Mode. These 16 pads represent 16 steps = 16 quarter notes.

If you want to program a longer or shorter track, hold TRACK + length and rotate


Press < or > to navigate through the pages:

To change the pad resolution, hold TRACK + zoom and rotate


Tip To get a track length with a 1/16th note resolution (e.g. 15steps, 1bar + 1step, 1bar + 2steps) : configure SETTINGS > MISC > SIGNATURE = POLYRHYTHMS, then set TRACK ZOOM = x1 and TIME SIGNATURE = 16:4. Then you can set the number of STEPS in TRACK LENGTH by pressing + rotating the encoder.
Tip Microscope mode: x16 (1600%) zoom provides you with the highest degree of precision to edit your track step by step.


Zooming in changes the track resolution (step length) and allows you to rotate your track with increasing precision.
Note: this feature can use a lot of processing resources and memory.

You can copy multiple steps by pressing 2ND + copy + the first and the last steps

Then you can paste notes and automation in the current track or in another track. Press 2ND + paste + the step

Note: copy/paste is not available in EUCLID stepmode.
Note: delete is not available in EUCLID stepmode.

Simply press ASSIGN to enable the "encoder step edit" feature:


In stepmode NOTE, encoders & touchpad will control:
1 note
2 note octave
3 note velocity
4 note width
5 note offset
touchpad X note velocity
In stepmode CHORD, encoders & touchpad will control:
1 chord degree
2 chord tonality
3 chord velocity
4 chord width
5 chord offset
touchpad X chord velocity
In stepmode EUCLID, encoders & touchpad will control:
1 euclid steps
2 euclid fills
3 euclid velocity
4 euclid gate length
5 rotate
touchpad X euclid velocity
In stepmode CC, encoders & touchpad will control:
3 CC value
touchpad X CC value
In stepmode EFFECTS, encoders & touchpad will control:
3 FX value
touchpad X FX value
Tip In LIVE mode, you can also use the touchpad to set the velocity of the keyboard and the smartpads.
Press ASSIGN again to disable these shortcuts.
In stepmode NOTE and stepmode CC MESSAGES, press 2ND + STEP to activate the filter, in order to scroll only through programmed notes or CC messages. A popup is displayed for a few time:


When the filter is activated, a circle pictogram is displayed next to the stepmode name:

Press 2ND + STEP to exit the filter mode.
Tip Without activating the filter mode, you can also jump to the next note by simply pressing STEP.
The viewed page (viewed bars on the 16 pads) can auto-follow the player position if you press 2ND + DISP. Useful if you are working on multiple pages.
